System Setup - Printers/video
Select Already Installed Printers to Work With ProPay
You must have administrative privileges to perform this task.
Go to Client Functions > Setup > System Setup > Printers.
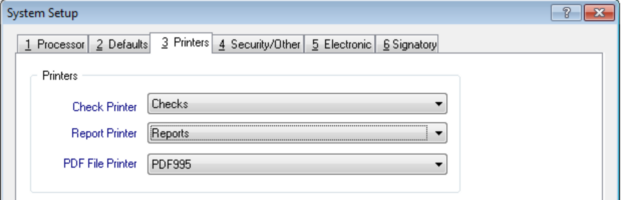
Check Printer
This entry tells the program which printer you intend to use for printing payroll checks. The program prompts Windows to provide a list of available printers on your computer. Select a printer from the list box.
CAUTION: The printer selected here must be capable of using MICR Toner and you must use this special toner cartridge when printing payroll checks.
Reports Printer
This entry tells the program which printer you intend to use for printing payroll reports. The program prompts Windows to provide a list of printers available on your computer. Select a printer from the list box.
 NOTE: We recommend that you use a separate printer for the payroll reports. By having only checks inserted in one printer and report paper in another printer, your processing speed and efficiency will be improved.
PDF Printer
See Installing the pdf995 driver for detail.
Check Printer Properties
To check the properties of an already installed printer driver:
- Click the Windows Start button.
- Go to Settings > Printers.
- Left-click once on the printer icon, then right-click and select Properties.
- Click the Graphics tab or Print Quality tab (these tabs may vary by printer).
Print resolution
ProPay works best with a printer resolution set at 600 DPI. If the print quality is OK you can leave it at that to preserve toner. Otherwise select a higher DPI resolution.
Printing From a Remote Computer to Your Local Printer Via RDP
This scenario applies to situations where:
- ProPay is set-up on the cloud and you are accessing ProPay from your home computer via RDP
- ProPay is set-up at your office and you are accessing ProPay from your home computer via RDP
- ProPay is set-up at your Central office and you are accessing ProPay from another office location via RDP
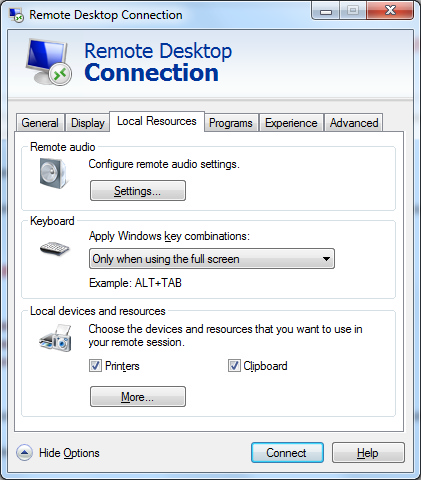
- Open Remote Desktop Connection by clicking the Start button, clicking All Programs, clicking Accessories, and then clicking Remote Desktop Connection.
- Click Options, and then click the Local Resources tab.
- Under Local devices and resources, select the Printers check box.
- Click Connect to start the session.
- Start ProPay and go to Client Functions > Setup > System Setup > Printers. Select any of your local printer(s) as your Reports/Checks Printer.
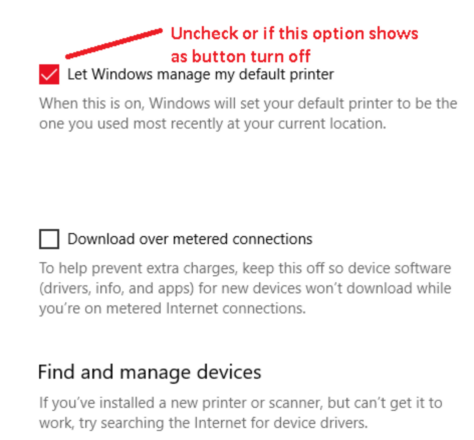
Set Windows 10 Default Printer Option to Off
If you are using Windows 10, set the option below for DEFAULT printer is the last printer to OFF
Setting Up Fonts
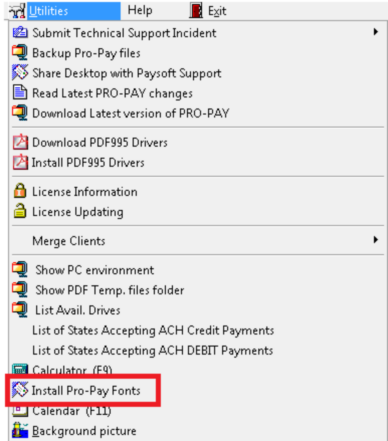
ProPay uses some special fonts that come with the program. These fonts are automatically installed and registered in the Windows font table during program installation and no further action is required by the user.
If you are running ProPay from a network station for the first time, you need to install the fonts to your station.
From the ProPay Main menu click "Utilities", "Install ProPay Fonts"
You must have administrative privileges to perform this task.
NOTE: This process may also be necessary from time to time, if you have "lost the fonts" for any other reason.
Installing fonts in Windows
You must have administrative privileges to perform this task.
From the Windows desktop, click Start > Help and Support. Search for key word Fonts until you find the help topic with instructions on how to install fonts. Note that these instruction may vary depending on which version of windows you are using.
The following Fonts exist in the \PAYSOFT\PROPAY26\ folder and may be installed by the user, if not already installed during program installation:
- "PSOFT.TTF"
- "TAXTB___.TTF"
- "TAXDRAW_.TTF"
- "TAXTEXT_.TTF"
Install ProPay fonts in Windows 7
Go to \PAYSOFT\PROPAY26 folder, click Type to sort the files by type. Scroll down until you locate the above 4 files. Hold your CTRL key and click each of them to select them. Right click and select Install.
Optionally, you may copy the above fonts into the \windows\Fonts folder and install them from there, or you can also install any font by dragging it into Fonts in Control Panel.
Install ProPay fonts in Windows 10
Click the Settings icon on the left side of the desktop (it looks like a gear)
Search for fonts
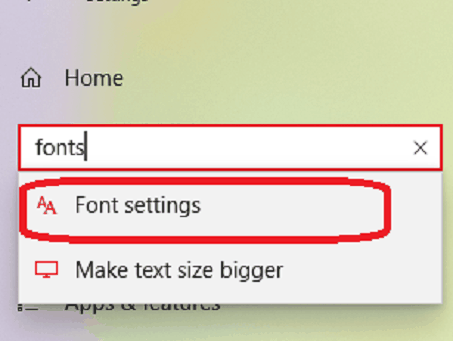
Select Font settings
Open your Windows Explorer and find the following fonts in your \PAYSOFT\PROPAY26 folder
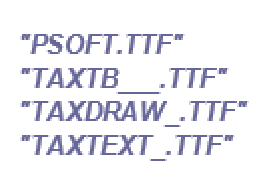
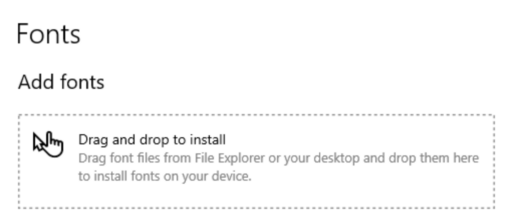
Under Fonts in Windows 10, drag a drop these files into your Windows font directory using the following Add Fonts option in Windows 10.
Video Display
Your video display settings affect how the ProPay screens look. To adjust your display settings:
- Right-click the Windows desktop and select Display settings.
- Set the resolution to 1366 x 768 or higher for the best results.
- Set the scale to 100% (or adjust if text appears too small or too large).
Recommended display settings:
| Setting | Recommendation |
|---|---|
| Resolution | 1366 x 768 or higher |
| Color depth | True Color (32-bit) |
| Font size | Small Fonts (fits more information) or Large Fonts (easier to read) |